 このページの作成日 このページの作成日2008/12/25 |
だっぺ屋サイト↓ |
Paint.NET公式サイト↓ |
||||||
| マニュアルメニュー | TOP | 機能と使い方 | プラグイン | レタッチ例 | 効果使用例 | ギャラリー |
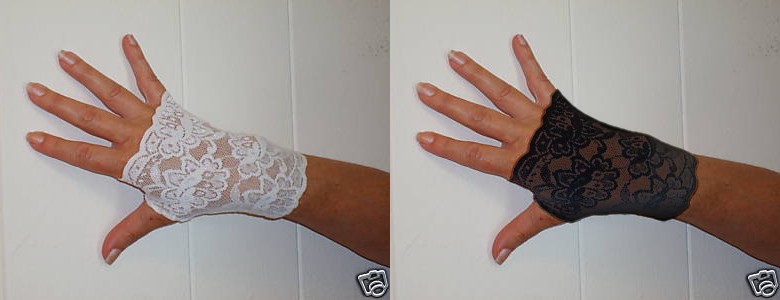
| Changing the color of lace gloves ( My answer for a question on the pdn forums ) Japanese version (英訳 ちびた母様 感謝!) | |
 |
|
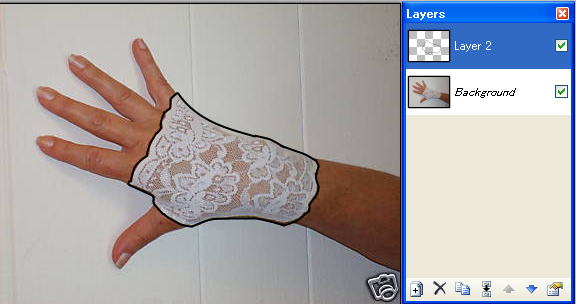 Step 1: Tracing the outline Step 1: Tracing the outlineCreate Layer 2 Choose Line/Curve tool and select blush size2. Then tracing outline of the glove. |
|
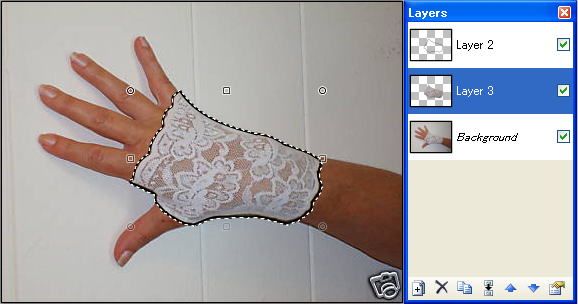 Step 2: Pasting Layer 2 onto Layer 3 Step 2: Pasting Layer 2 onto Layer 3Select Layer 2 . Choose "Magic Wand"tool and select outside of the glove or point the wall. Select Menu ->Edit -> Invert Selection Select Bacground Layer Select Menu ->Edit ->Copy Select Menu ->Edit ->Paste into New Layer |
|
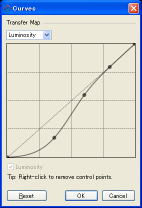
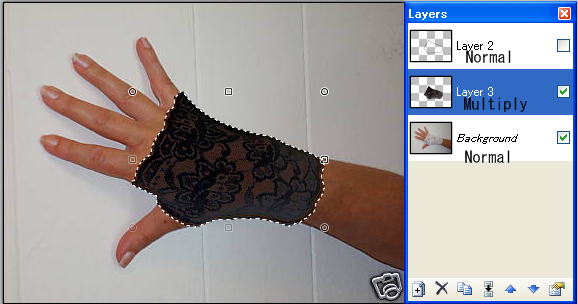 Step 3: Changing the color of the glove Step 3: Changing the color of the gloveTurn Layer 2 view off by unchecking the view box. Open Properties of Layer 3 and select Blending Mode to "Multiply". Select Menu ->Adjustment ->Curves. Please make a curve shown on below. 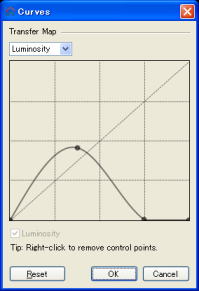 <About Curves> <About Curves>Since white and black is not in hue circle, using "Hue/Saturation"or "Conditional Hue/Saturation"to change from white to black or vice versa is not a good choice. This reason applies to change from white/black to another col or. Main point of this tutorial is to keep see-through fabric texture of the glove. The white part of the glove is about 70-75 % Gray. ( You can check this by using "colorPicker ") Adjust curve line over 75 % Gray portion to 0 %. You can check the new color of Layer 3 by unchecking the view box of Background Layer. Selecting blending Mode to "Multiply"makes the color natural. If you want to use "Invert Colors" feature to change the color from white to black, you need to change the glove to Gray scale. I'll explain it at the end |
|
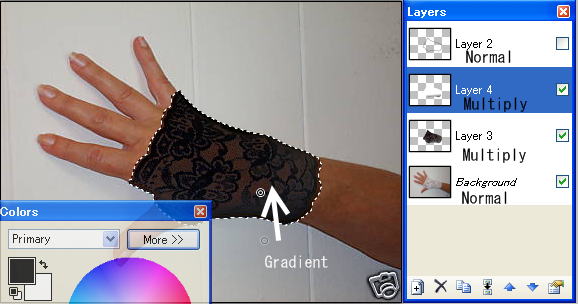 Step 4 : Adding shadows Step 4 : Adding shadowsCreate Layer 4. Open Properties of Layer 4 and select Blending Mode to "Multiply" Select "Gradient" tool and choose "Liner " mode. Use default color (black/white) and apply it bottom portion of the glove. |
|
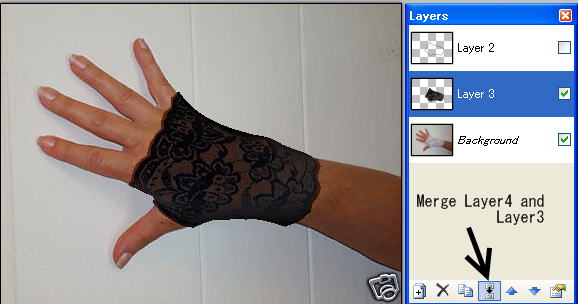 STEP 5 : Merge Layer4 and Layer3 STEP 5 : Merge Layer4 and Layer3Click merge button to merge two layers. |
|
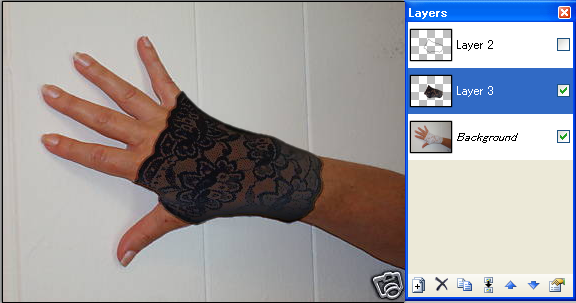 STEP 6 : Anti-aliasing STEP 6 : Anti-aliasingUsing Plug-in "Feather" Select Radius 2 Strength 2 Check "True Feather" check box. 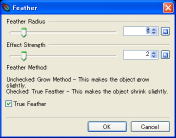
If you'd like to light it up, adjust Layer 3 Opacity. I've changed opacity from 255 to 240 and adjusted Luminosity of curves little bit. |
|
| Another method of " STEP 3 ". The colors are bit different but it works well too! Turn Layer 2 view off. Open Properties of Layer 3 and select Blending Mode to "Multiply". Select Menu ->Adjustment ->Black and White( Important!!) Select Menu ->Adjustment ->Invert Colors Select Menu ->Adjustment ->Curves Please see example for adjusting "Curves". Follow previous Step : 4 to 6 to complete. 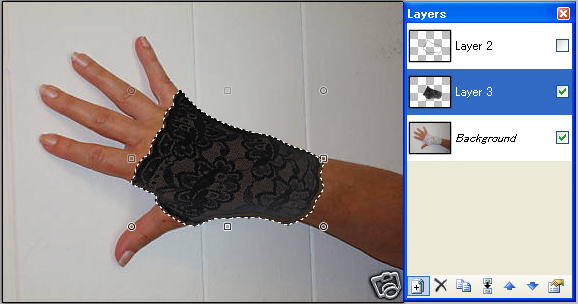
 |
|
Changing other colors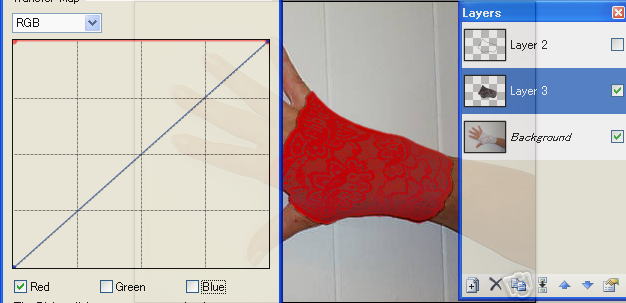 Change "RGB" using "curves" To change the glove to red, select Red to flat 255. Then you can use "Hue/Saturation"  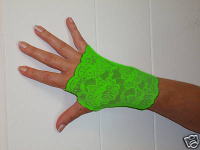  |
|
| These are basic techniques and you may find
other ways to do it. I used original photo(400X300) from the sender but if you want to do it neatly, higher resolution is recommended. Please experiment!! |
|